Forminator 101
A step-by-step guide by Adrian Kane
Forminator is a multi-platform, easy to use form-building software for WordPress. It allows you to build slick forms, quizzes, and polls with minimal effort. Forminator’s drag and drop builder is simple but comprehensive, allowing the user to create beautiful forms in a matter of minutes!

Benefits of Forminator
- Slick User Interface
- It’s Fully Modular
- Includes Premade Templates
- Automatic email responses
- Comprehensive supporting documentation
- Preview Tool
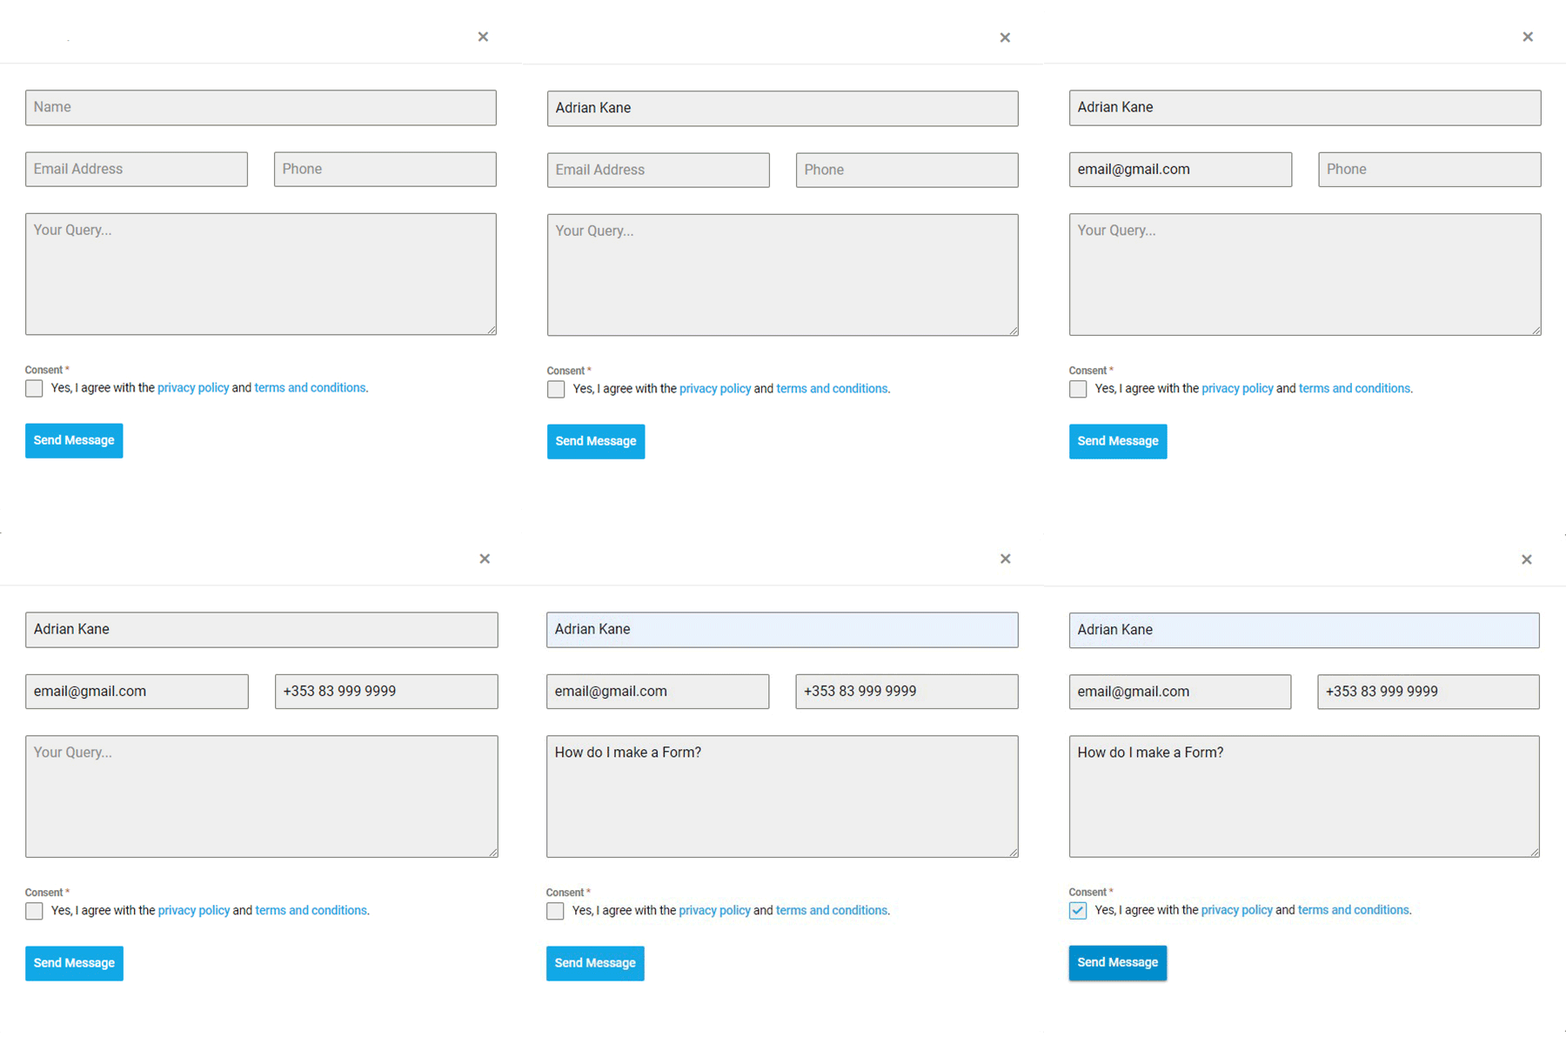
As already mentioned, Forminator does much more than building forms, but for the purpose of today’s tutorial, we will be utilizing its form builder. I’ve personally used Forminator’s form builder on every site I’ve built, and each time it has taken minutes to create the form(s) and match them to the color scheme of the site.
For today’s tutorial, we want to keep it basic so, step by step, we will be creating and embedding a simple contact/enquiry form to demonstrate how quick and easy the process is.
To Jump to the form, click here
Form Creation made easy with Forminator
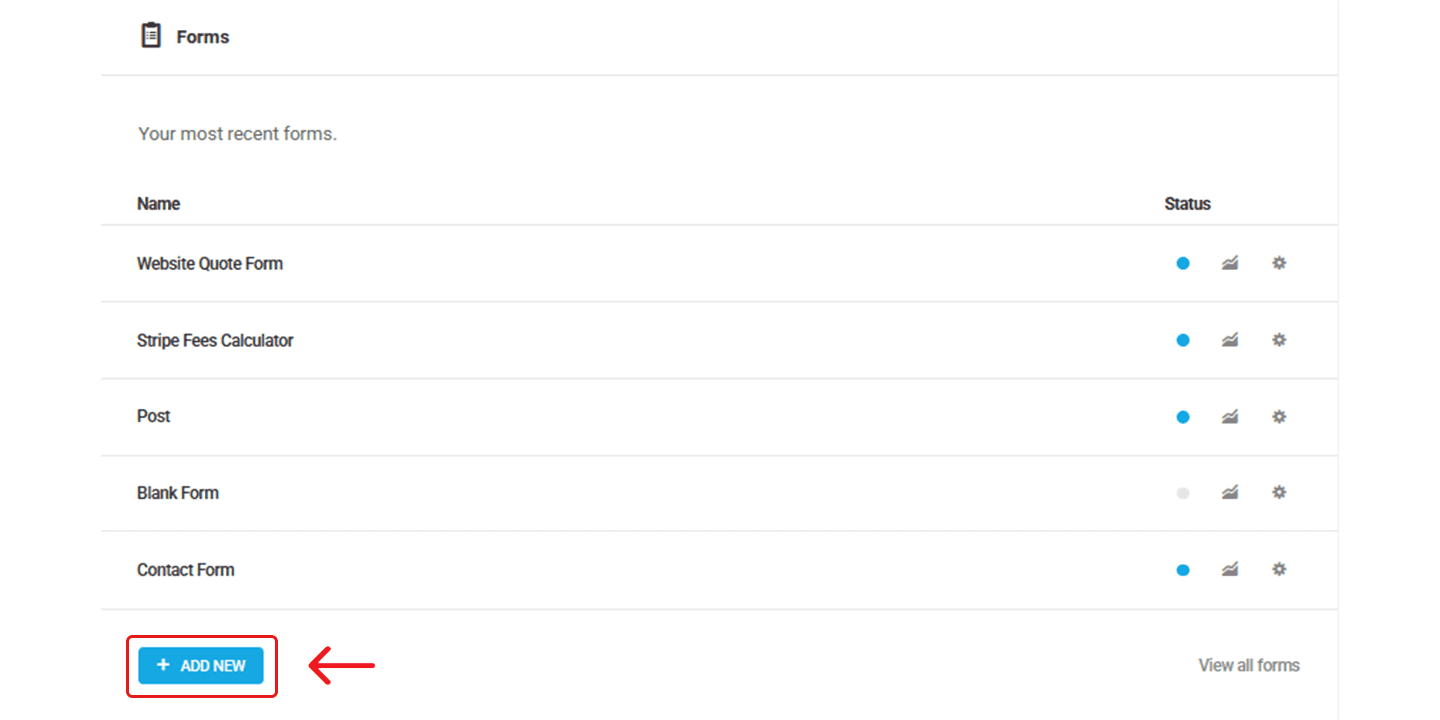
When we open Forminator we will be brought to the dashboard which features the three creative options. These are forms, quizzes, and polls. For the benefit of today’s tutorial we will select “Create” under the form option, as shown below.
Create and Name Your Form
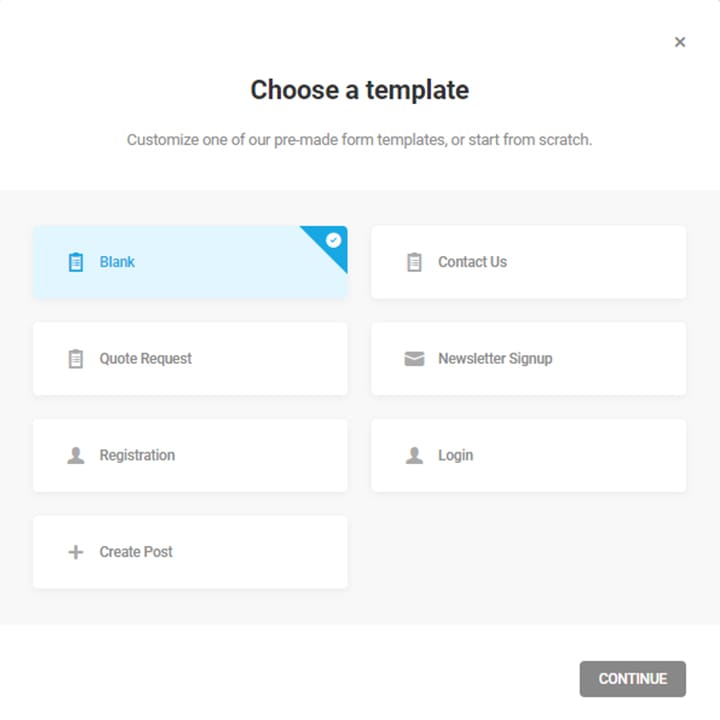
Once “Create” is selected, a pop-up will appear asking which template to use. On this occasion, we will select “Blank” so we have a clean slate to work from
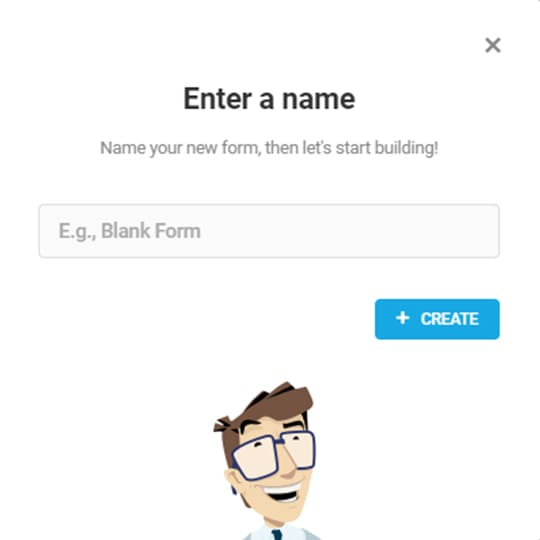
We then click “Continue” to move on. Another pop-up will appear asking you to name your form. I’m going to name it “Blank” and click “Create”.
Create and Name Your Form
Once “Create” is selected, a pop-up will appear asking which template to use. On this occasion, we will select “Blank” so we have a clean slate to work from
Before We move On…
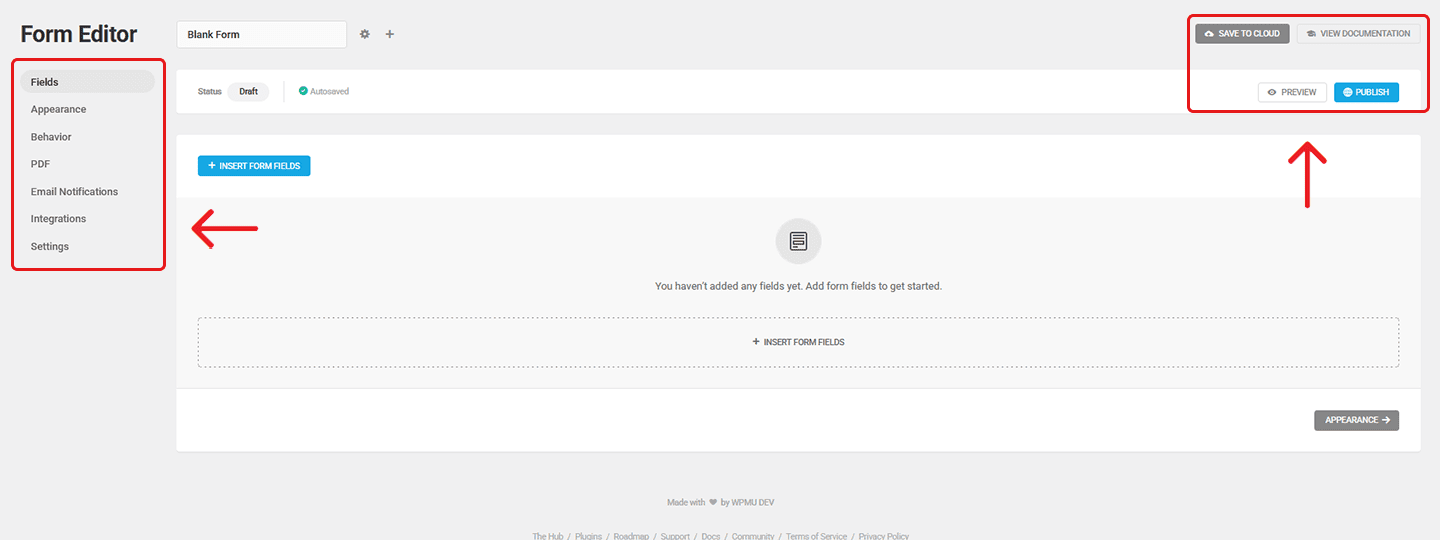
In the next window, we see a column on the left that lists the various features we can edit. We will go sequentially through these, starting with the “Fields” tab. Before we do this, I want to note the four options in the top right corner: “Save Draft”, “Preview”, “Publish”, and “View Documentation”. The first three are very useful tools we will use along the way, and the last is a fantastic resource that you can use to fill in the gaps of what isn’t covered comprehensively here. But first, let’s build our form!
Fields
Your content goes here. Edit or remove this text inline or in the module Content settings. You can also style every aspect of this content in the module Design settings and even apply custom CSS to this text in the module Advanced settings.
Labelling
Your content goes here. Edit or remove this text inline or in the module Content settings. You can also style every aspect of this content in the module Design settings and even apply custom CSS to this text in the module Advanced settings.
Settings
Your content goes here. Edit or remove this text inline or in the module Content settings. You can also style every aspect of this content in the module Design settings and even apply custom CSS to this text in the module Advanced settings.
Preview
After I add any field(s), I like to click “save draft” as a precaution. I then click preview to get a look at how it’s coming along
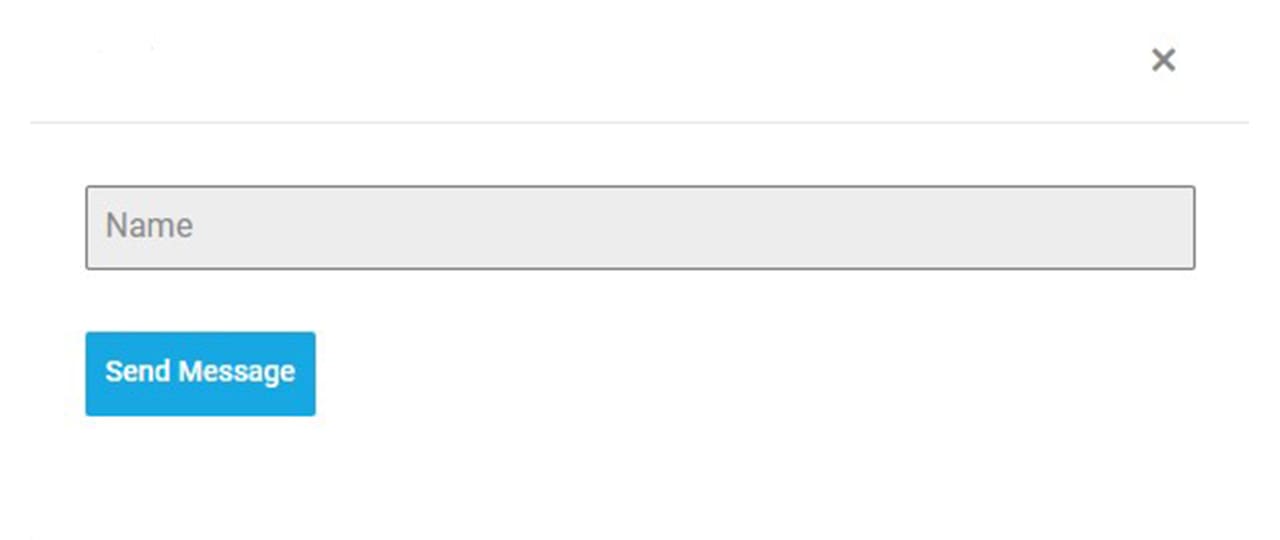
So, here’s how your form should look so far. Works nicely for drawing Kris Kringle names, but not much else. Let’s flesh it out!
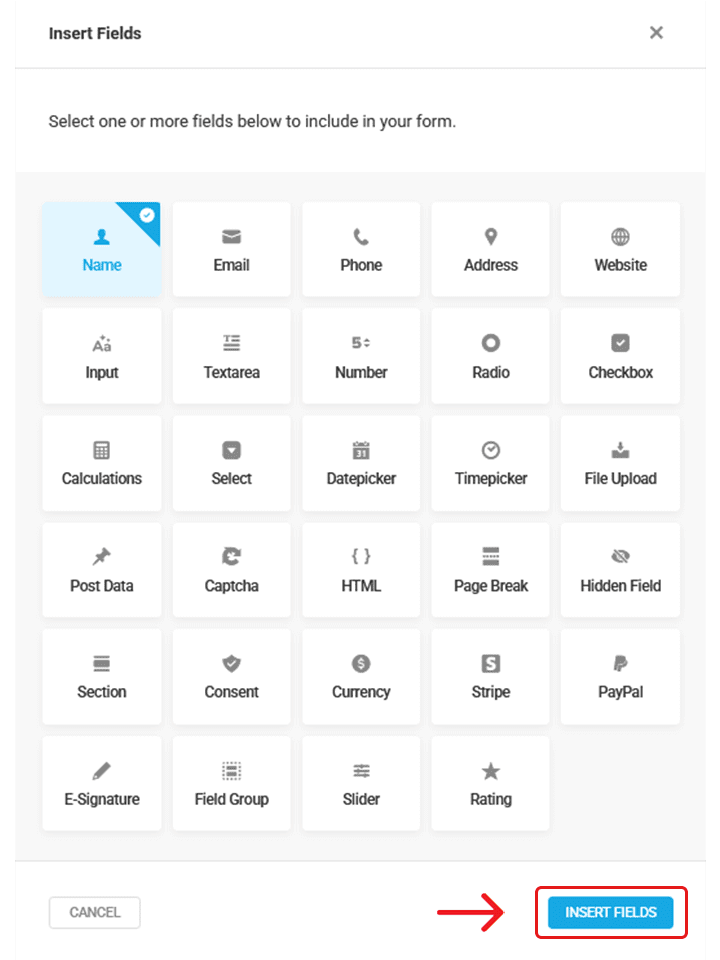
Let’s bulk add “Email”, “Phone” and “Textarea” fields. After hitting “Insert Fields” again they will be added.
We will also add a “Consent” field, as this is required in the EU to comply with GDPR regulations (There’s no need to talk about this now, but have a look at the link for further information).
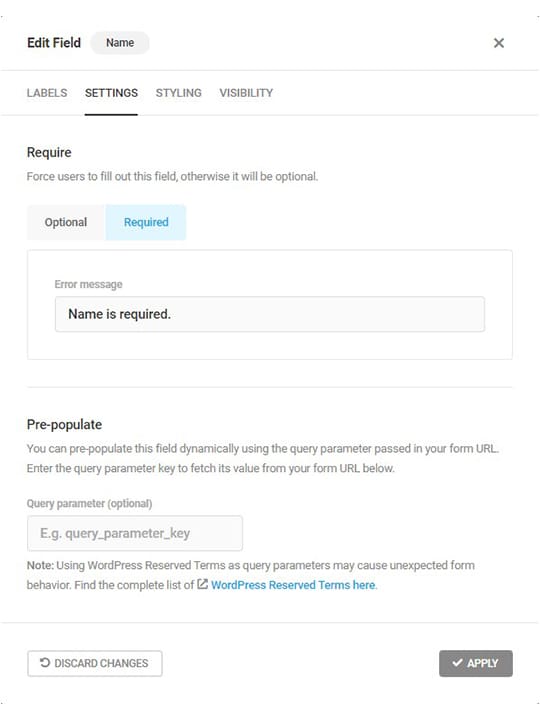
In terms of the settings tab in each of these, set all to “Required” Except for the “Your Query?” text field we made. There is no need to ayn more for the purpose of this tutorial.
Once these are added we will click save draft and the preview to see how it looks.
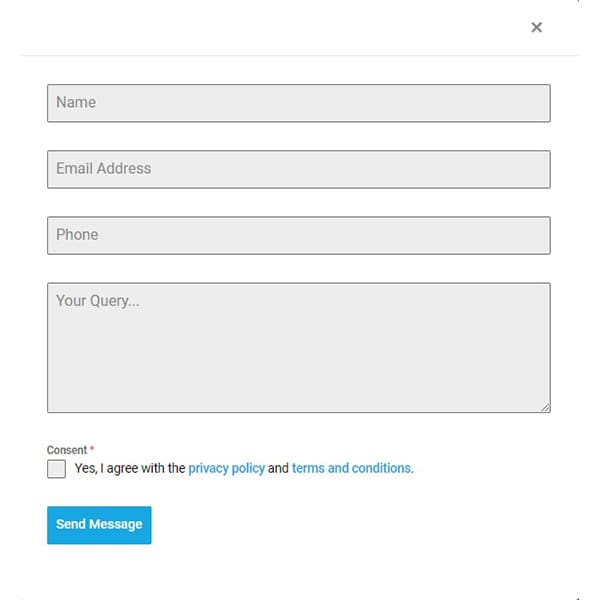
Not bad, but we can then use Forminator’s drag and drop feature to make it a bit nicer. We’ll pull the phone field up beside the email field. We do this by dragging it to the left of the email field until a blue line appears to its right. Let go of the mouse button, and we are left with this:
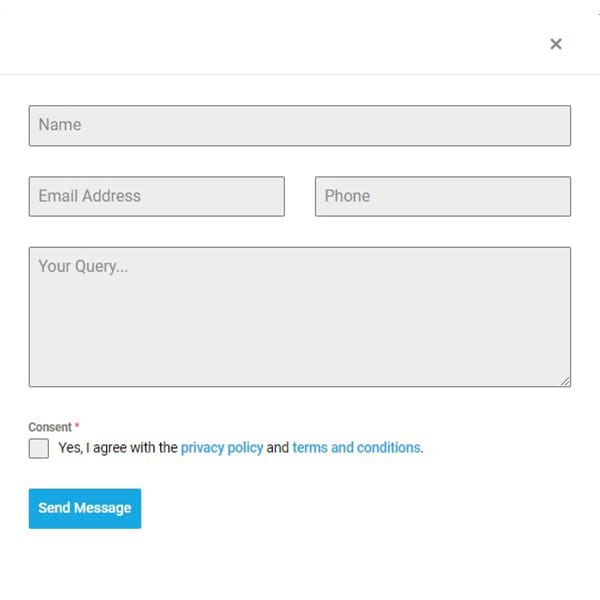
I’m happy with the shape, but there’s more we can do to make it a bit nicer. In the left hand column, there are still numerous features we can edit; six in total. Because this is a quick tutorial, we’ll only cover the essentials.
We’ve done the fields, now we’ll look at the Appearance tab and then the Email Notifications. After these you should be ready to start your own Forminator journey!
Appearance
At first glance, the Forminator “Appearance” tab is somewhat daunting. But when you break each tab down, It’s very straightforward. The six tabs are nicely explained beneath each title, so we won’t get into it today.
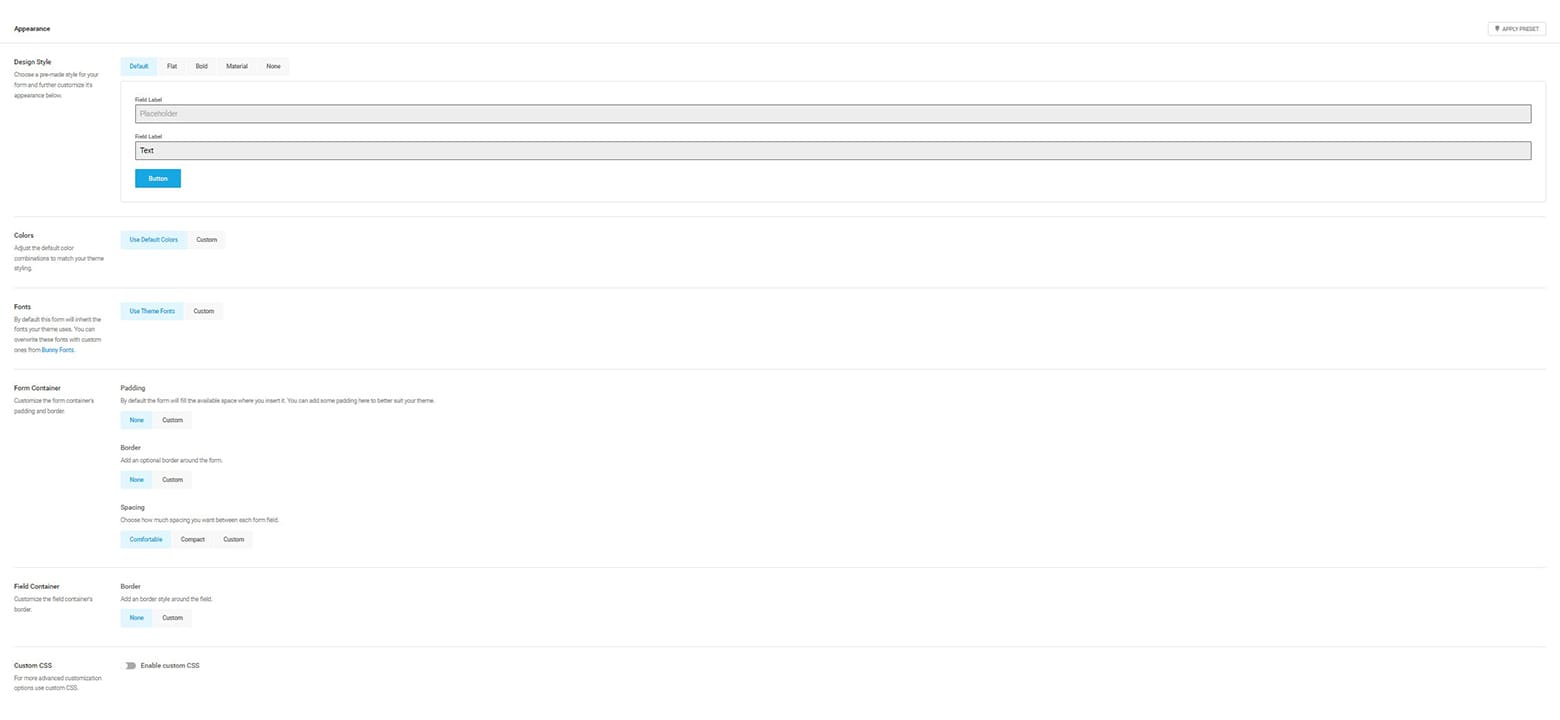
They are all very intuitive, and I feel it’s better to just mess around with them. Also remember to use the comprehensive documentation for help. For Today We will just look at color editing, but it is worth noting the “CSS” option. This allows one to implement their own style; if you are familiar with CSS it is very easy to use. Anyway, let’s move on to colors.
Colors
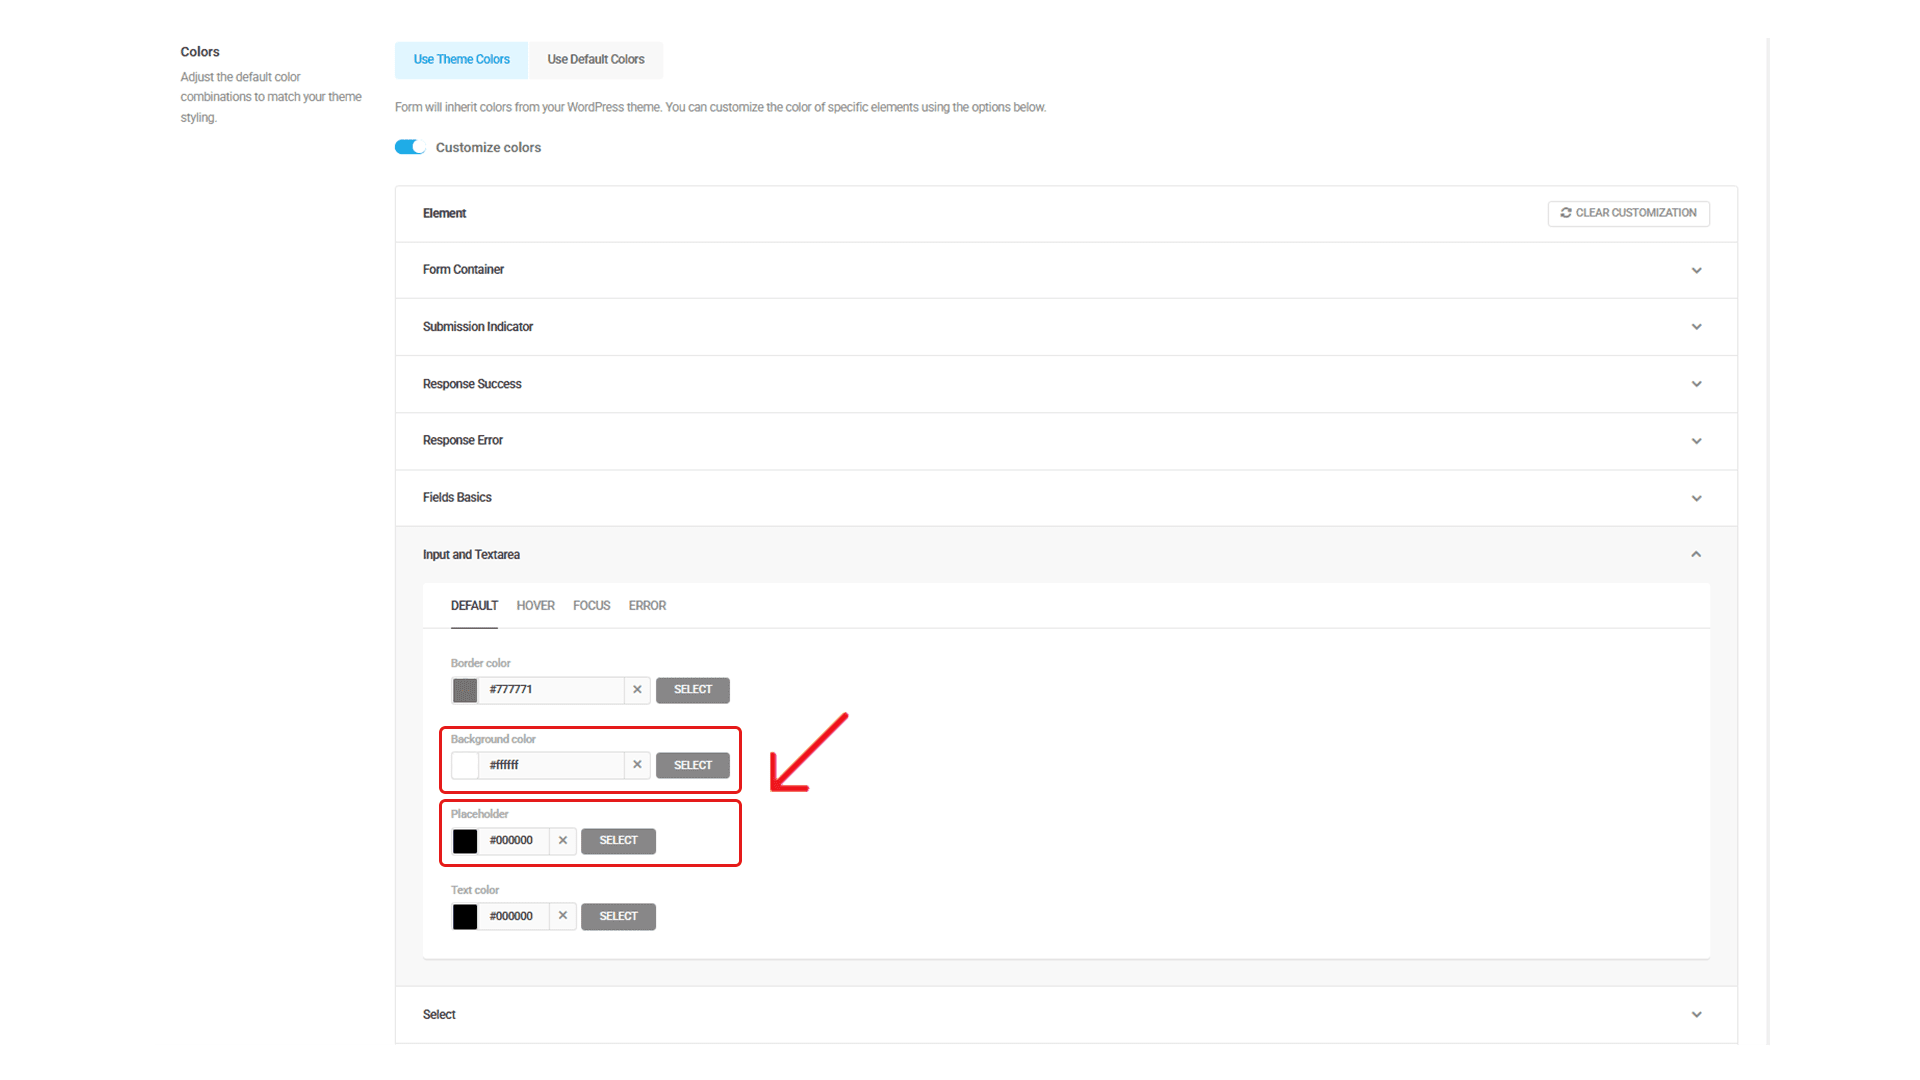
First, we must set them to “Custom”rather than “Use Default Colors”. The sheer number of possible customizations is fantastic!
You will see hexadecimal values in each for coloring the elements any shade you like. Personally, this is my favorite part of the process as, with the use of the preview button, one can completely change the look and feel of a form. Every element’s title explains what it does, so after a while using it, it will become second nature for you to go in and change any color, any time.
For now let’s just change the colors of the placeholder and background to the following:
Background: #ffffff
Placeholder: #000000
Now your form should look like this…
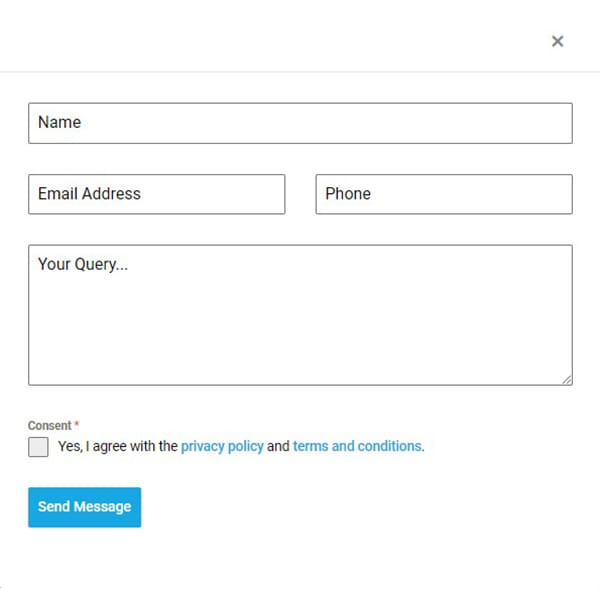
I’m happy with it. Simple, but effective.
Email Notifications
The final piece of this tutorial will cover how to set up email notifications for Forminator. When you go onto the tab, It should look something like this…

Admin Email
The Admin Email is the email which you, or the administrator of the site, receives once someone submits a form. You can edit it to say whatever you want. Let’s click on it to see what we can do.
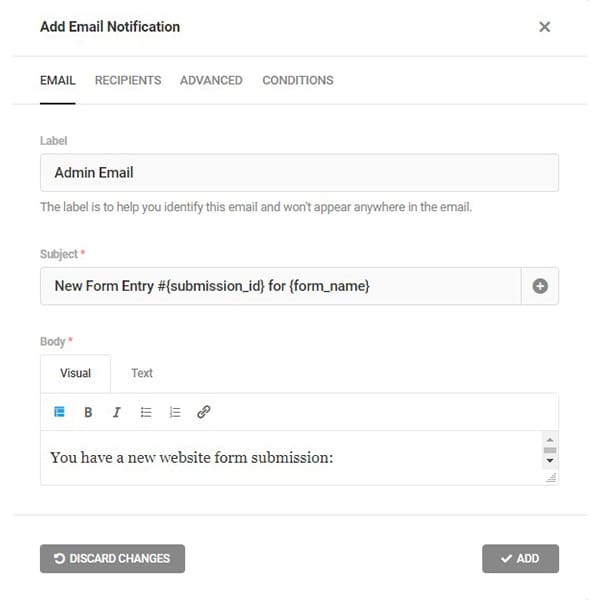
In the “Subject” Field we see a couple of codes indicated by text within curly brackets. These will draw on information inputted to the form field it is associated with. For instance {name-1} would indicate the first name field on the form, so if we had first name and surname fields, they would automatically appear as {name-1} and {name-2}. All shortcodes can be found in the fields tab.
We need to change the subject of the email first. By default it has “New Form Entry #{submission_id} for {form_name}” which is useful information, but doesn’t suit our form. I think we should change it to something less formal, so when it shows up in the inbox we’ll want to open it. My personal preference is something like “Yay! You have a new query!!!”
In the body, it has…
“You have a new website form submission: {all_fields}
This message was sent from {site_url}.”
This is comprehensive, but lacks a personal touch.
How about…
{name-1} has a question for you: {textarea-1}
Their full info:
Name: {name-1}
Email: {email-1}
Phone: {phone-1}
Query: {textarea-1}
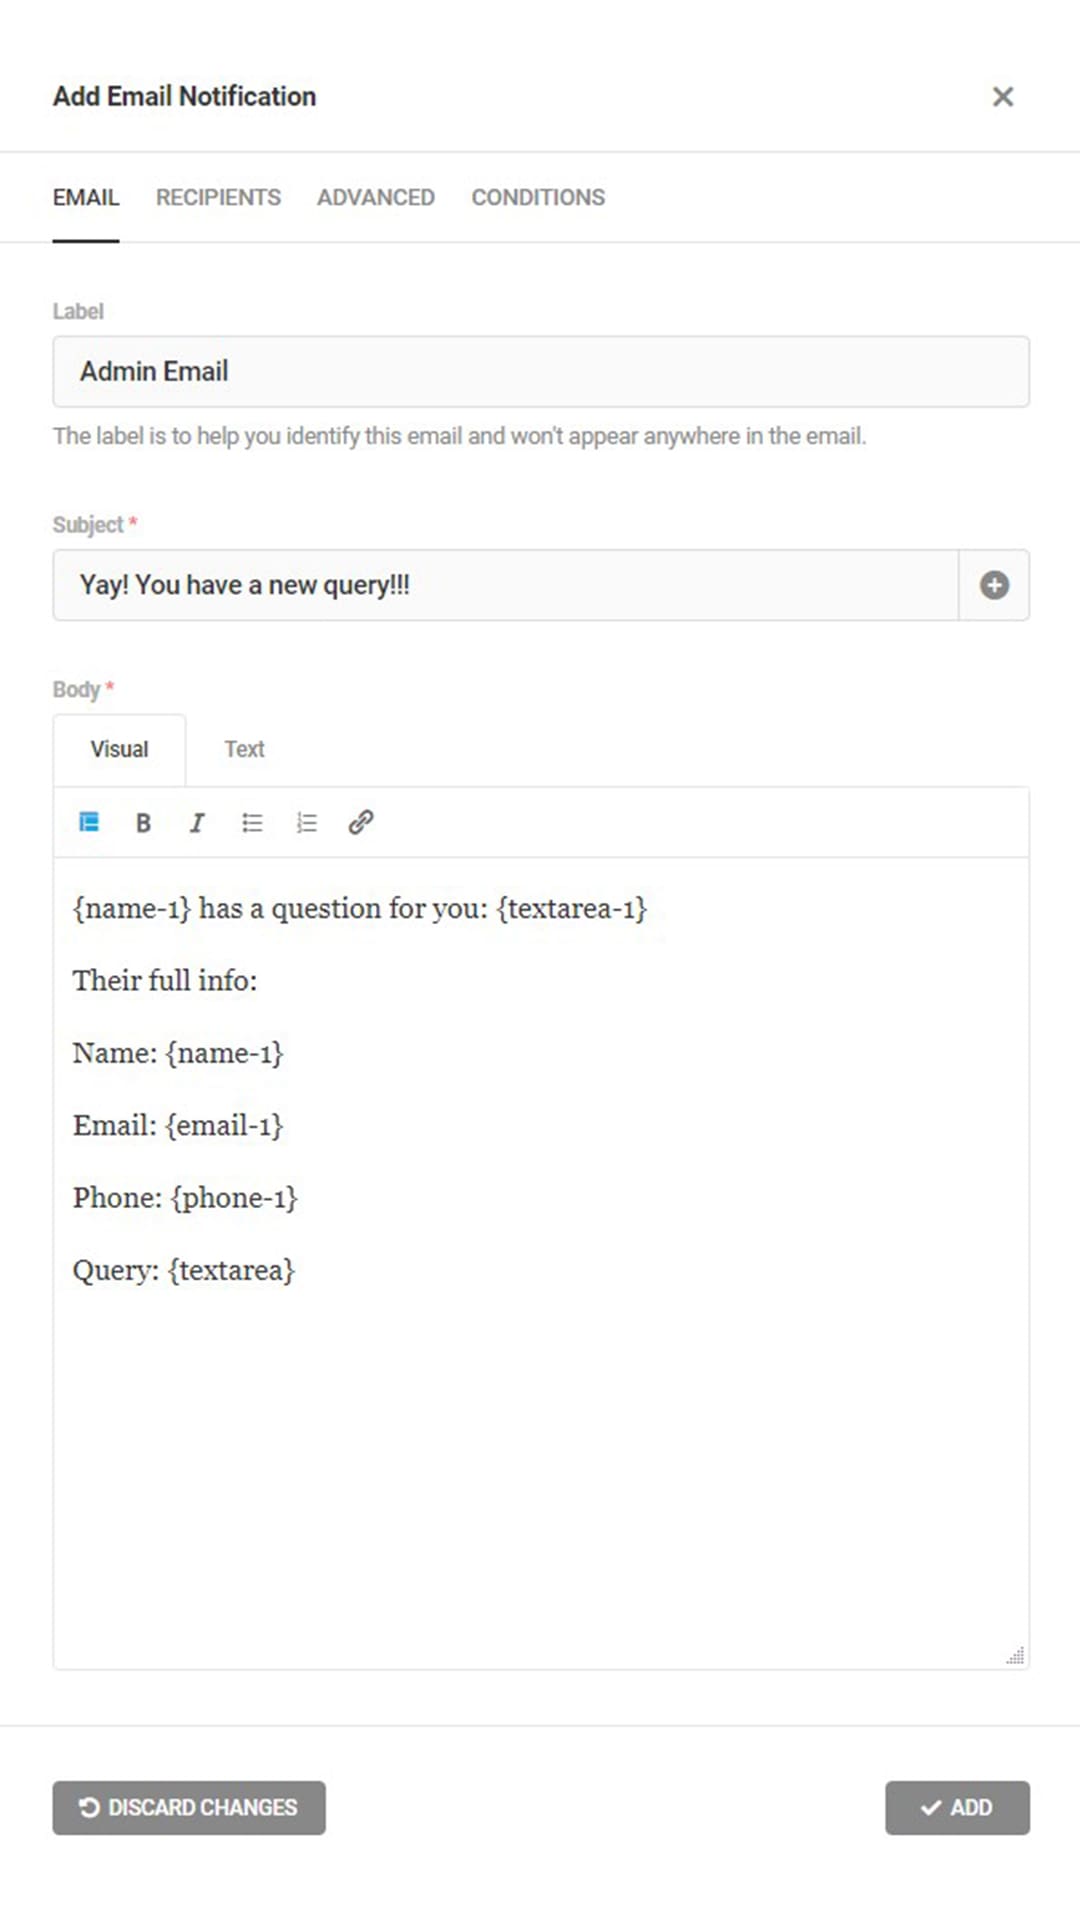
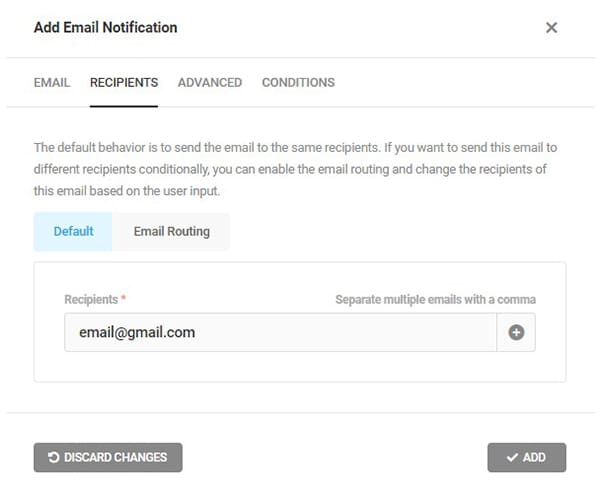
So now that the email text is set, let’s add the recipients! You can add as many as you like, but if you are the admin, add whichever email you wish it to send to.
For the purpose of this tutorial, you can ignore the “Advanced” and “Conditions” Tabs. Click “Add” to save changes.
User Response Email
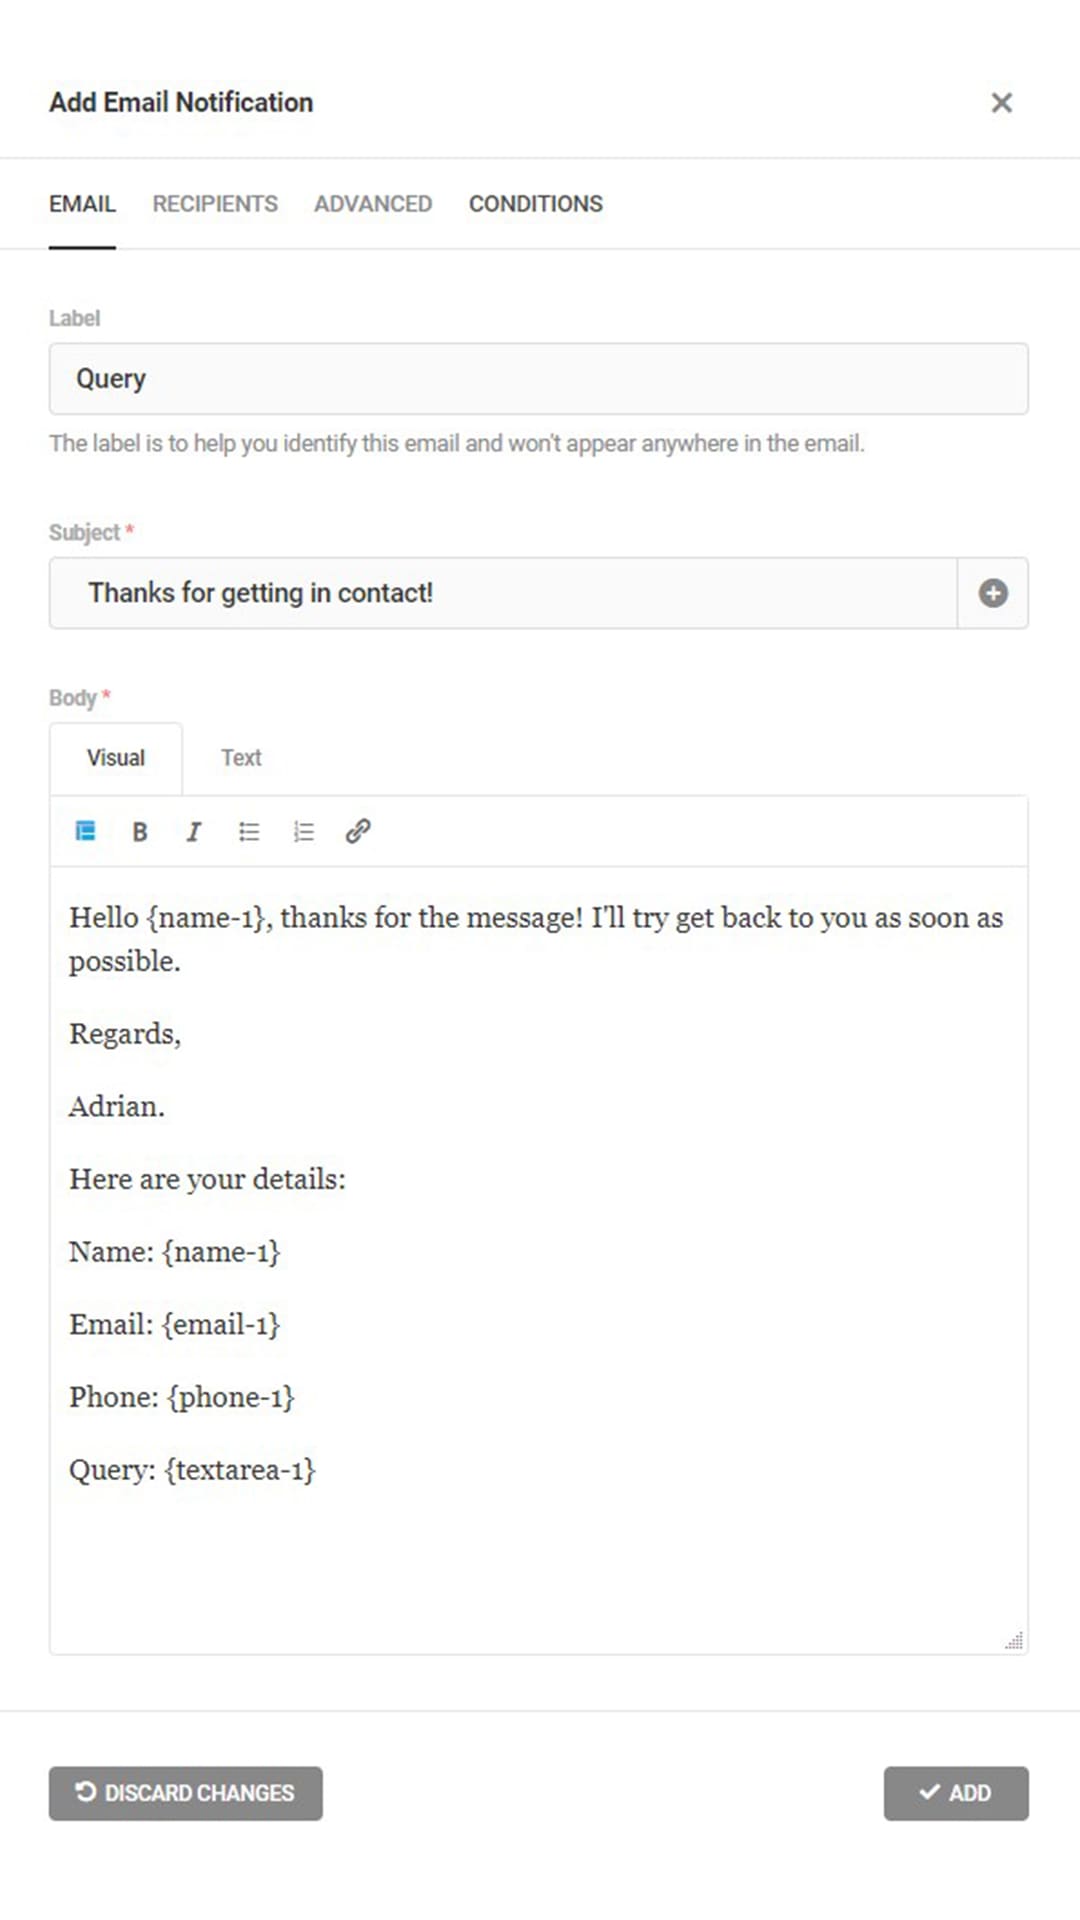
The User Response Email is sent to the person who filled out the form online. I always try to make mine light hearted:
Hello {name-1}, thanks for the message! I’ll try get back to you as soon as possible.
Regards,
Adrian.
Here are your details:
Name: {name-1}
Email: {email-1}
Phone: {phone-1}
Query: {textarea-1}
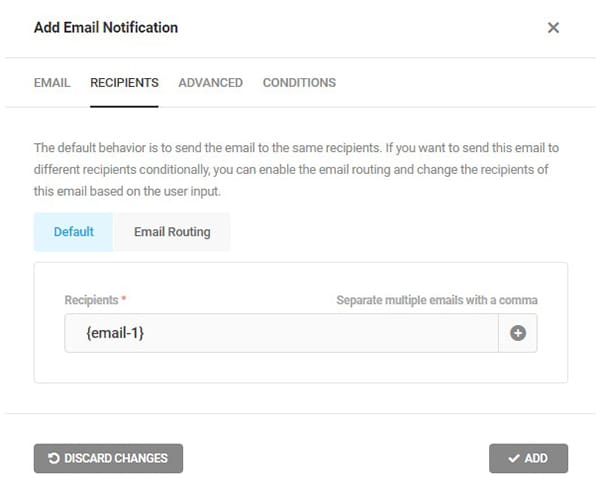
For “Recipients” We should add the form-filler’s email. This will be {email-1} in most cases.
Click “Add” to save changes.
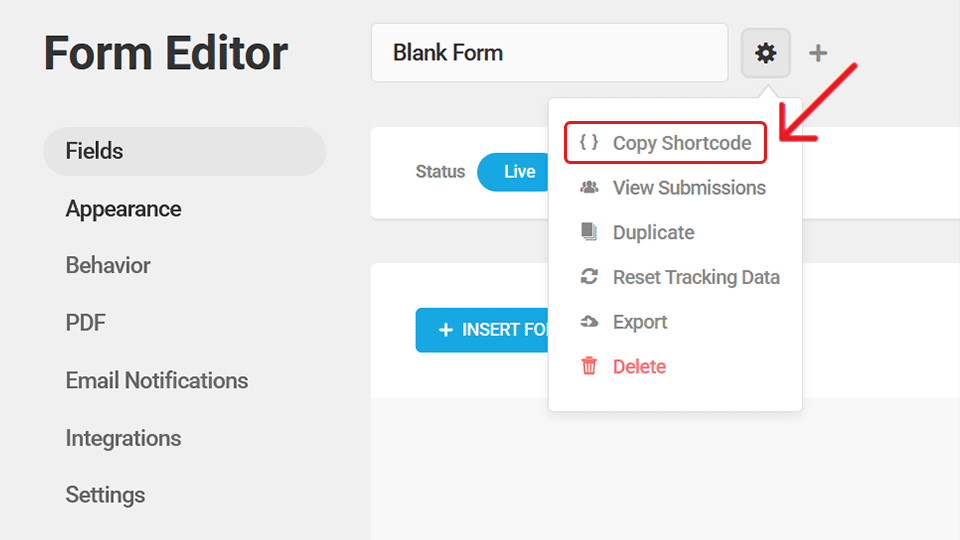
So, we’ve finally arrived at the end of our Forminator tutorial. All that is left is to preview the form, check everything for errors, and click “Publish”. To use your form, simply click on the cog next to the title of your form, then click “copy shortcode”. Paste the shortcode in a line of paragraph text to embed it in a post or page.
P.S. Feel Free to mess around with the Forminator form I built below!
Thank you for taking the time to read my beginner’s guide to Forminator. I hope it was helpful!